Create Android Project in Android Studio
Creating an Android project in Android Studio is straightforward. Here’s a step-by-step guide to help you get started:
Step 1: Launch Android Studio
- Open Android Studio. If this is your first time using it, you’ll be greeted by the “Welcome to Android Studio” screen.For install android studio
Step 2: Start a New Project
- Click on “New Project”:
- On the welcome screen, click on “New Project” to start the project creation wizard.
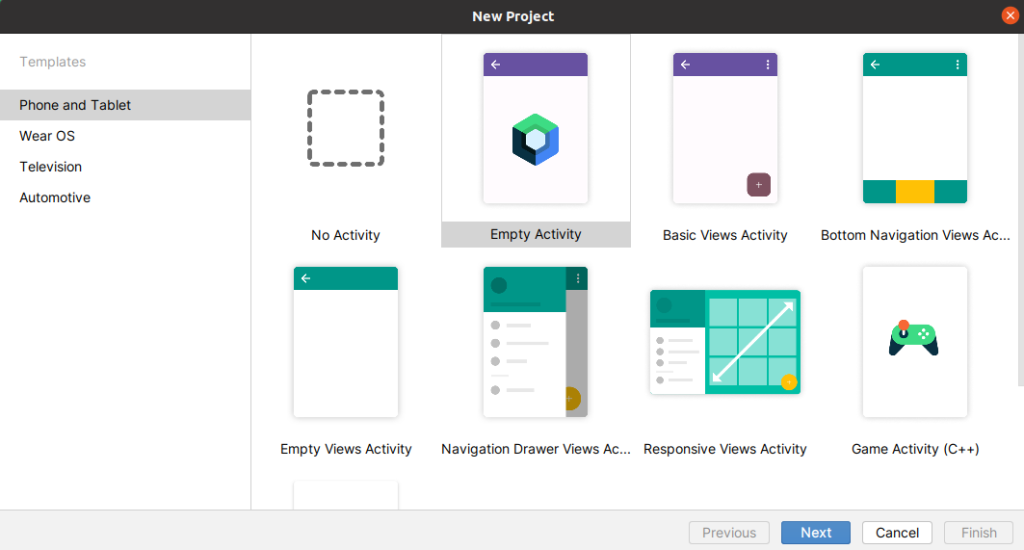
- Choose a Project Template:
- Android Studio offers several templates to get you started quickly. These templates include common app structures, such as:
- Empty Activity: A minimal setup with a single empty activity.
- Basic Activity: An activity with a basic structure including a toolbar and a floating action button.
- Bottom Navigation Activity: Includes a layout with bottom navigation components.
- Fullscreen Activity: A full-screen layout for immersive content.
- Login Activity: A basic structure for a login screen.
- Select “Empty Activity” for simplicity, and click “Next.”
- Android Studio offers several templates to get you started quickly. These templates include common app structures, such as:
Step 3: Configure Your Project
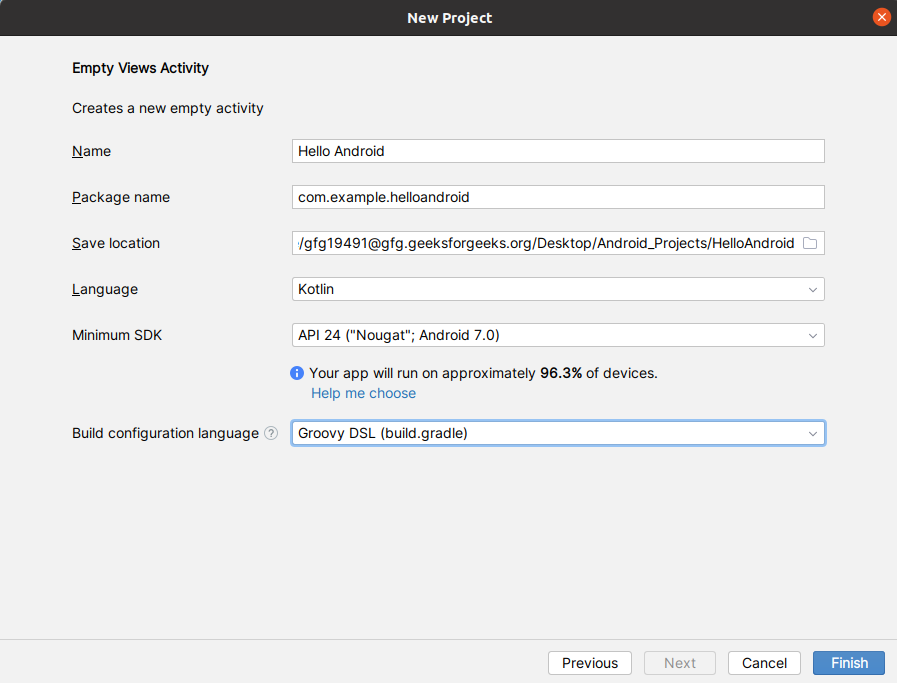
- Name Your Project:
- Enter a name for your project. This will be the name of your app (e.g., “MyFirstApp”).
- Package Name:
- The package name uniquely identifies your app on the Play Store. It usually follows the convention
com.example.myfirstapp. You can leave the default or customize it.
- The package name uniquely identifies your app on the Play Store. It usually follows the convention
- Save Location:
- Choose the directory where your project files will be stored.
- Language:
- Select the programming language you want to use:
- Java: The traditional language for Android development.
- Kotlin: The preferred language for Android development, recommended by Google.
- Select the programming language you want to use:
- Minimum SDK:
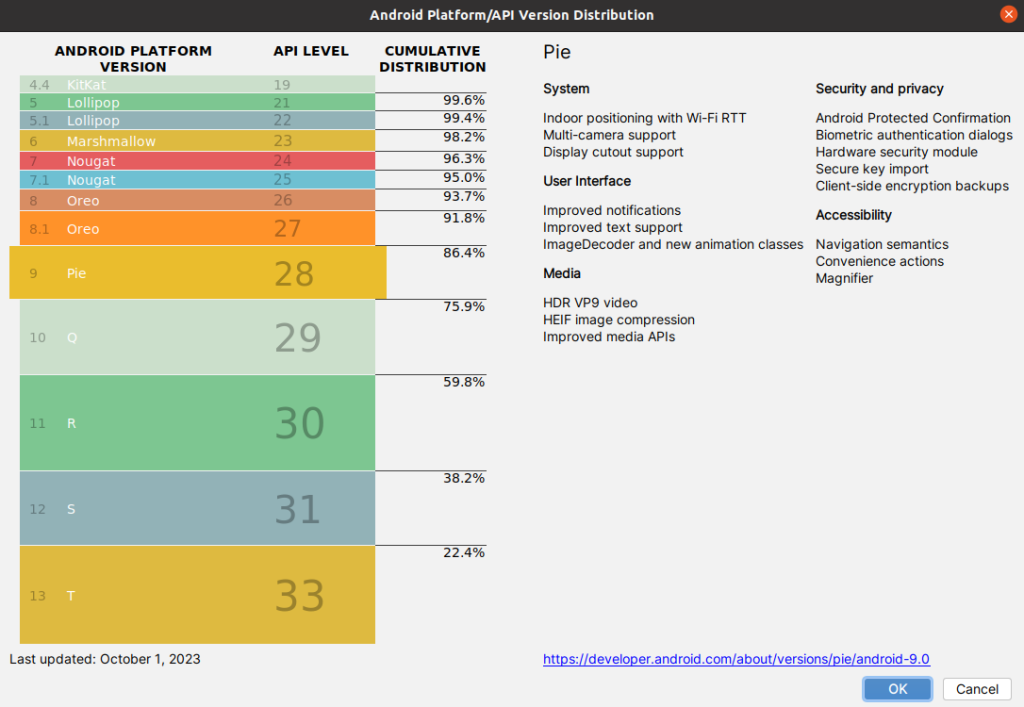
- Choose the minimum API level your app will support. The API level determines the lowest Android version your app can run on.
- You can select a version that balances between covering a large user base and using newer Android features. For a simple app, API Level 21 (Android 5.0 Lollipop) is a good starting point.
- Click “Finish” to create your project.
Step 4: Explore the Project Structure
- Once your project is created, Android Studio will display the main IDE interface with your new project open.
Step 5: Familiarize Yourself with the IDE
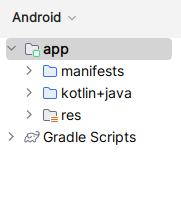
- Project Explorer (left pane): This displays your project files and folders.
app/src/main/java/: Contains your Java/Kotlin source code.app/src/main/res/: Contains your app’s resources, such as layouts, strings, and images.
- Editor (center): The central area where you write and edit your code.
- Tool Windows (bottom): These include tools like Logcat for debugging, the Terminal, and Build output.
Step 6: Edit the Main Activity
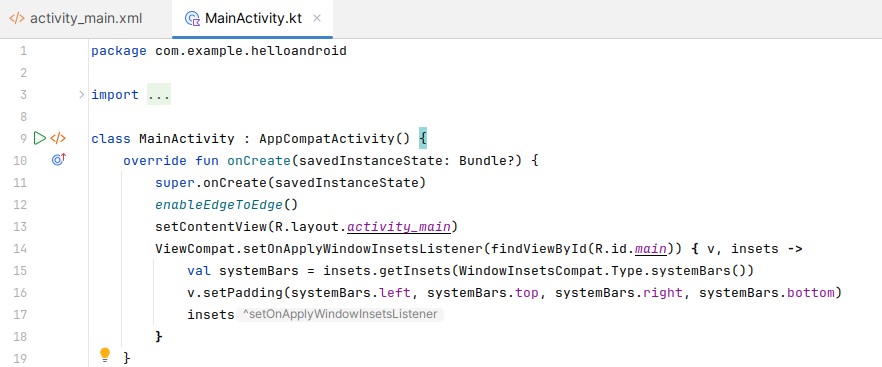
- Open MainActivity:
- In the Project Explorer, navigate to
app/src/main/java/com/example/myfirstapp/and openMainActivity.javaorMainActivity.ktdepending on the language you chose. - This file contains the code for your app’s main activity.
- In the Project Explorer, navigate to
- Open the Layout File:
- In the Project Explorer, navigate to
app/src/main/res/layout/and openactivity_main.xml. - This file defines the UI for the main activity. You can edit it using the visual editor or directly in XML.
- In the Project Explorer, navigate to
Step 7: Run Your App
- Set Up an Emulator or Connect a Device:
- If you haven’t set up an Android Virtual Device (AVD), you can do so by going to
Tools > AVD Managerand creating a new virtual device. - Alternatively, you can connect a physical Android device via USB and enable USB debugging.
- If you haven’t set up an Android Virtual Device (AVD), you can do so by going to
- Run the App:
- Click the green “Run” button in the toolbar (or press Shift + F10) to build and deploy the app to your selected device/emulator.
- Android Studio will compile your code, build an APK, and install it on the device/emulator.
- View the App:
- Once the app is installed, it will automatically launch on the device/emulator. You should see the default layout generated by the “Empty Activity” template.
Step 8: Modify and Test
- You can now start modifying the code and layout files to customize your app.
- Use the “Run” button to quickly test your changes.
Conclusion
Congratulations! You’ve successfully created and run your first Android project in Android Studio. From here, you can start adding more activities, explore Android’s vast library of components, and build more complex applications.
